On this page
If your bathtub drain is clogged, first check that the stopper opens fully and remove hair caught around it. If the tub is the only fixture draining slowly, a sink-style cup plunger or a suitable hand drain cable may clear a reachable obstruction. Leave the threaded drain flange in place while doing this. Removing the visible metal basket is a different job from lifting out a stopper, and it can disturb a sealed connection beneath the tub.
Start with the smallest accessible part of the problem. A tub that empties slowly because its linkage holds the stopper down does not need the same repair as a blocked pipe. Water rising into the tub when another fixture drains is a reason to investigate the shared drainage system instead of adding another household mixture.

Identify whether this is a tub blockage or a shared drain problem
Stop adding water and watch what happens. Note whether the tub empties gradually, stays at the same level or receives water from somewhere else. Check the nearby sink and toilet without deliberately filling fixtures that are already backing up.
| Observation | Useful next check | What it changes |
|---|---|---|
| Tub drains slowly but nearby fixtures work normally | Stopper travel and hair just below the opening | Begin with accessible cleaning |
| Drainage improves when the stopper is lifted farther | Stopper adjustment, linkage and debris around the seal | The opening may be restricted before the pipe |
| Water rises in the tub when another fixture is used | Shared branch or downstream drain | Stop using the affected fixtures and arrange diagnosis |
| Water leaks below the tub or marks the ceiling beneath | Drain, overflow or another concealed connection | Do not continue filling or plunging |
| A dropped object disappeared down the opening | Object location and access | Avoid pushing it deeper with an improvised tool |
A gurgling sound alone does not identify the failed component. Record which fixture was operating and whether water actually backed up. Those observations are more useful to a plumber than a guess that the vent or trap must be blocked.
If a chemical drain opener or unknown cleaning product is already in standing water, do not plunge, dismantle the drain or insert a cable. Keep its container or product name for whoever deals with the blockage. Drano's own precautions prohibit plunging during or after its drain-opener treatment because remaining product can splash back. Do not mix cleaners or try to neutralize one with another.
Remove the stopper without loosening the drain flange
Protect the tub surface, put on gloves and keep a small container for screws and removed parts. Photograph the stopper in both positions. A towel over the drain opening while handling a loose screw prevents a second problem.
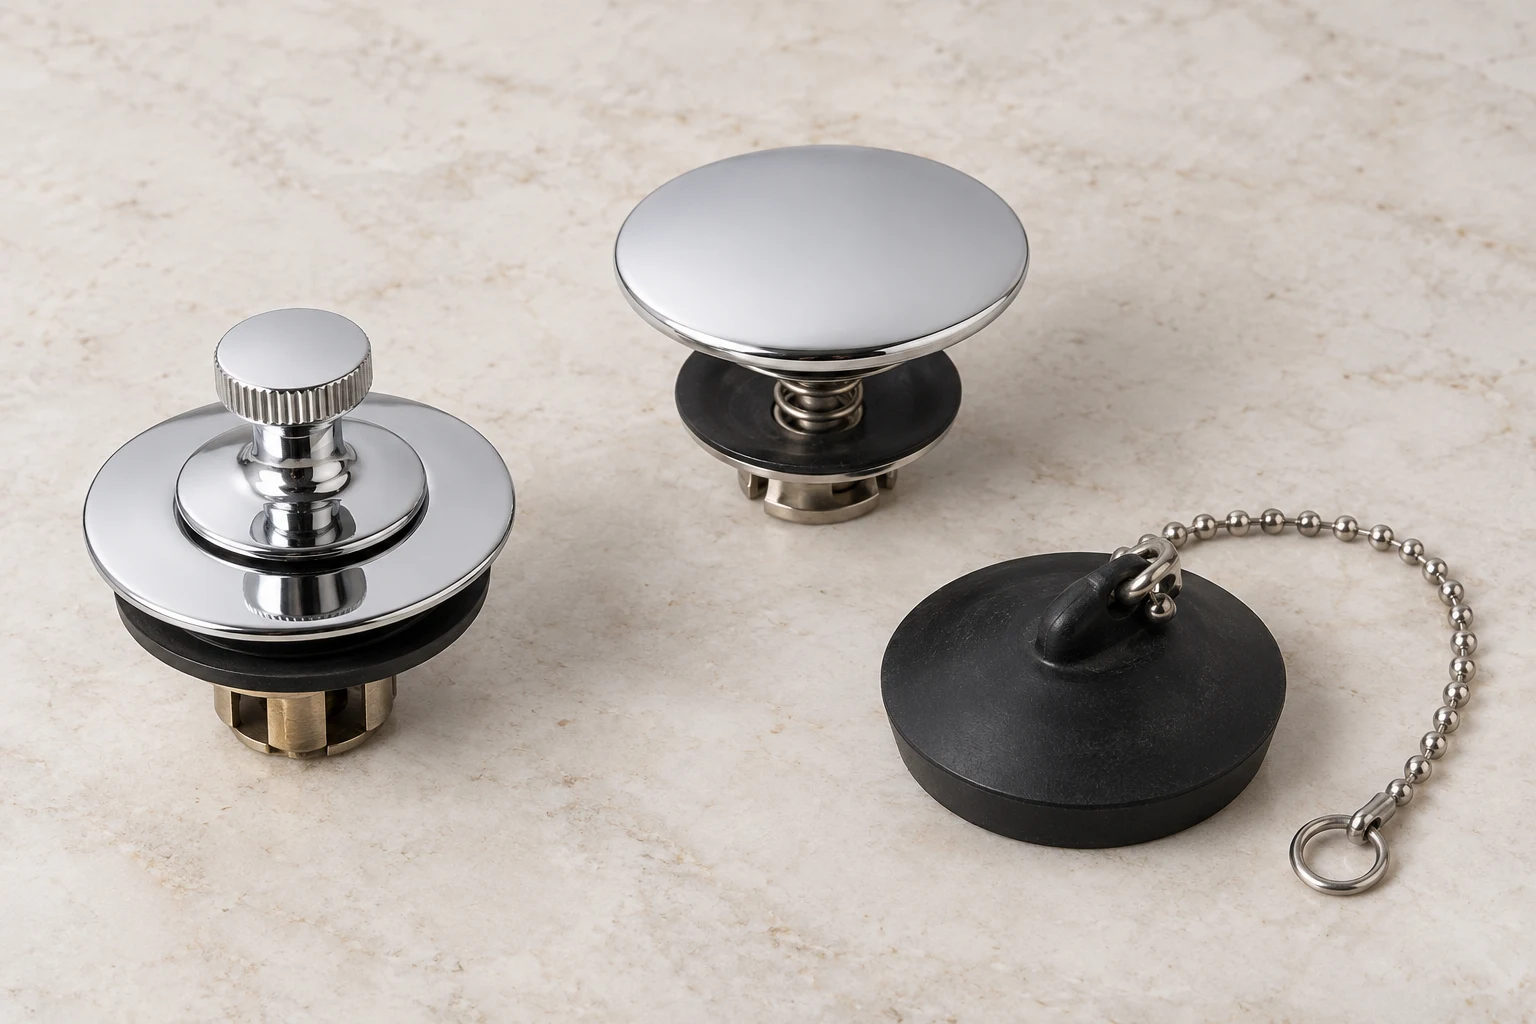
The stopper is the movable closure. The flange or drain spud is the fitting sealed into the tub's bottom opening. Crossbars inside that fitting may be used by a drain-removal tool; they are not an instruction to unscrew it for ordinary hair removal.
Lift and turn or push pull stoppers
Look underneath the raised cap for a set screw or a connection to a center post. Depending on the design, removal involves releasing that screw, unscrewing the cap or turning the raised assembly. Hold the part intended to remain stationary instead of twisting the whole drain fitting.
These names describe operation, not one universal attachment. For example, Kingston Brass's cleaning instructions describe particular lift-and-turn and toe-tap designs that unscrew in their fully raised position. Check your own drain's parts diagram before applying that method to a different assembly. If the cap spins without releasing, stop and identify the connection rather than increasing force.
Toe touch or click operated stoppers
Open the stopper and check whether the decorative cap separates from a cartridge beneath it. Some designs expose another fastening point after the cap is removed. Release the parts in the specified order, keeping washers and seals together.
Do not grip a finished cap with bare metal pliers. If a tool is permitted, protect the finish and avoid squeezing a thin hollow component out of shape. A seized mechanism, a damaged center post or movement of the entire flange is a reason to stop.
Trip lever and linkage assemblies
A lever on the overflow plate may operate a visible pop-up stopper or an internal plunger. If the stopper does not open far enough, the linkage itself can restrict drainage. This Old House's bathtub-drain guide includes this often-missed branch.
For a serviceable design, photograph the lever and linkage before removing the plate. Withdraw the assembly carefully according to its instructions; it can be longer than the opening suggests. Do not bend the rods to get them out or lose a small connector into the overflow.
The overflow is also a watertight assembly. Keep its gasket properly supported and in position. If the elbow or gasket slips behind the tub, or the fitting cannot be checked through an access panel, do not simply screw the plate back against the wall and assume it has sealed.
Pull out accessible hair and clean the moving parts
With the stopper removed, use a flashlight to inspect the opening. Pull reachable hair out with an appropriate plastic hair-removal tool or another tool intended for that drain. Work gently around the crossbars and avoid pushing debris farther down. Put the material in the trash rather than washing it into the next bend.
Clean the removed stopper, its underside and any accessible seal with a method permitted for the finish. A soft brush can reach a narrow recess without scraping a plated surface. Check for a distorted seal, broken spring or damaged attachment; cleaning does not restore a cracked part.
Run a small amount of ordinary tap water while watching the level. If drainage is already restored, reinstall the stopper and test again with it in the open position. This comparison tells you whether the obstruction was removed or the stopper is still limiting the opening.
Do not repeatedly pour boiling water into an unknown combination of tub material, drain components and pipework. Nor should you treat visible fizzing as evidence that a hair blockage has been removed. A mechanical result is observable: the obstruction comes out, the stopper opens correctly and the tub drains normally afterward.
Use a cup plunger only when the assembly is intact
A flat cup plunger needs a seal at the bottom drain. The overflow is a second air path, so it also needs to be temporarily sealed during plunging. Keep this attempt limited to a sound, accessible tub drain containing ordinary wastewater, with no chemical cleaner present.
- Make sure the stopper is removed or fully out of the flow path. Temporarily cover the overflow opening with a wet cloth, without dropping the cloth or loosening its sealed fittings.
- Use enough water to cover the plunger cup. Keep room in the tub so the motion will not send dirty water over the rim.
- Set the cup over the drain and press gently first to expel trapped air. Maintain the seal through controlled push-and-pull movements rather than striking the tub or using violent pressure.
- Break the seal carefully, remove the temporary overflow cover and observe the drainage. Retrieve material that comes up instead of sending it back down.
The This Old House procedure also seals the overflow for plunging. Its other household remedies are not prerequisites for this method. If one careful attempt does not improve the flow, change the approach rather than repeating forceful cycles against a concealed connection.
Choose the right access for a hand drain cable
A short hair tool and a hand-operated drain cable do different jobs. The first collects material close to the opening. The second must negotiate the drain route and requires a suitable cable, access point and operating method.
On many conventional tubs, the overflow route gives a drain cable access without forcing it through the bottom drain's crossbars. The stopper linkage has to be removed where it occupies that route. This is an access option, not permission to feed a cable into every opening: integrated, cable-operated and concealed-overflow tubs can be different.
The RIDGID KWIK-SPIN+ instructions identify bathtub-overflow access and require checking for chemicals and tool suitability first. Use the manual for the actual tool; a cable intended for one pipe range or fixture is not automatically suitable for another.
For an appropriate hand cable, follow its feed and rotation directions, keeping the exposed working length controlled. Advance gently, then retrieve accumulated debris as instructed. Stop if the cable kinks, will not advance without force or cannot be withdrawn normally. Do not add a drill because a similar-looking model permits powered operation. This guide does not cover powered drain machines or opening concealed pipework.
Once the cable is out, clean it according to its instructions and restore the overflow components correctly. If you cannot maintain or verify the overflow seal, leave the tub out of service until the assembly is checked.
Reassemble and test more than the open drain
Restore the linkage, cap and any retained seals in their original arrangement. Confirm that the stopper opens fully without rubbing or hanging up. A small adjustment should follow the assembly's instructions; shortening a linkage arbitrarily can trade slow drainage for a stopper that no longer closes.
Check the repair in stages:
- Run a modest flow with the stopper open and inspect accessible connections beneath or behind the tub.
- Close the stopper and hold a small amount of water to check its seal.
- Release that water and watch the drainage under a larger flow than the first rinse.
- If overflow parts were disturbed, have that joint tested using the manufacturer's procedure before treating the tub as ready for a full bath.
Keep towels and an inspection light available during the checks. Stop immediately if a connection leaks. A clear pipe and a watertight waste-and-overflow assembly are separate results; one does not establish the other.
Replace a stopper or drain assembly only for the problem it solves
A worn stopper seal, broken mechanism or damaged linkage may justify replacing a compatible stopper. Match its attachment, operating system and drain fitting. The appearance and finish are not enough to establish fit.
A leaking flange, cracked elbow or failed waste-and-overflow connection is a different repair. It requires the correct components, access to the connections and a way to test them. Oatey's bathtub-drain installation guide shows why this extends beyond removing the top trim: gasket positioning, pipe connections and material-compatible sealing all matter.
For example, that guide distinguishes pure acrylic from constructions containing ABS when choosing sealant. Do not apply one generic instruction to put plumber's putty under every bathtub flange. Follow the drain and tub makers' requirements and allow any specified sealant or jointing material to cure before testing.
This is where a maintenance job may become a plumbing replacement. If the concealed drain cannot be supported and inspected, arrange the repair rather than unscrewing the flange from above and hoping the elbow stays in place. Replacing the basket also will not clear a blockage farther along the branch.
Keep the drain usable after it clears
Fit a compatible hair catcher that does not prevent the stopper from opening properly. Empty it into the trash when hair collects, and wipe the accessible stopper instead of waiting for the flow to slow again. Avoid a fixed maintenance recipe that assumes every finish and drain assembly accepts the same cleaner.
If the problem returns quickly, record how soon it recurs and which fixtures are affected. Repeated clearing of the same small opening may be missing a damaged mechanism, retained object or downstream issue. That pattern deserves diagnosis rather than another round of stronger chemicals.
Common bathtub drain questions
Do I need to unscrew the drain to remove a clog
Usually the first checks are the removable stopper and reachable debris. The threaded fitting sealed into the tub can stay in place for these tasks. Removing it is justified by a specific repair, not simply by the presence of slow drainage.
Why does the tub drain better with the stopper removed
The stopper may not be opening far enough, or hair may be caught around its post or linkage. Clean it, compare its open position with the product instructions and check for a damaged part before blaming the entire pipe.
Can I replace the drain with a different style
Only if the replacement is compatible with the existing assembly or the complete waste-and-overflow system is being replaced correctly. Check the connection and mechanism first. A matching visible diameter does not prove that the thread, gasket and concealed fittings will work together.
When should I stop trying to clear it myself
Stop for chemical-contaminated water, a leak, a trapped object, several affected fixtures, damaged or seized fittings, or a cable that needs force. Also stop when a careful accessible cleaning and suitable tool attempt do not restore drainage. These observations help the person diagnosing it choose the next access point.